In this pointer, you will learn how to register a new student organization in Get Involved.
Basic Navigation
Let's start off by logging in.
Once logged in, you will see the home page of Get Involved on the top of the screen, click on the tab that says "Organizations." This tab will contain information on all of the active student organizations on campus.
Now click on the "Register an Organization" button on the left side of the screen under "Categories."
On this screen you will scroll down and click on the button that says "Register a New Organization." You will see three options: Athletics, Auxiliary, and Student Organizations.
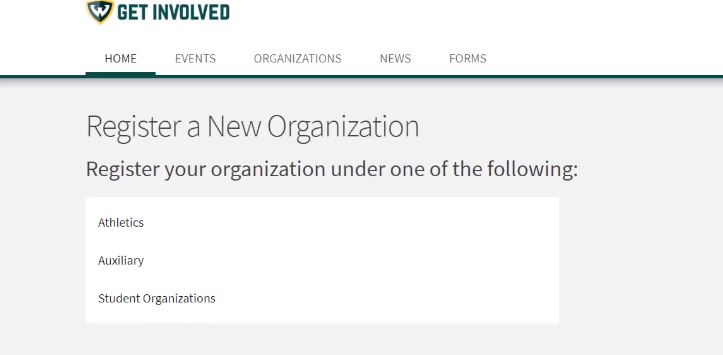
Click on "Student Organizations."
Submission Process
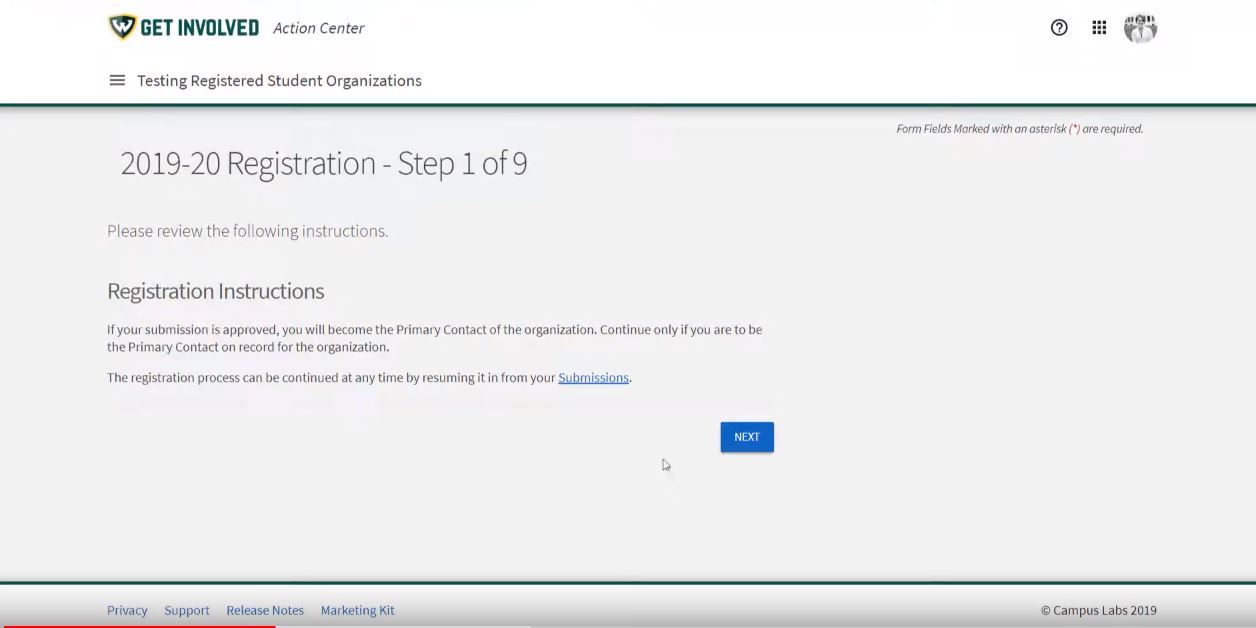
In step one of the submission process, read through the registration instructions. Remember that once your submission is approved, you will be the primary contact of the organization. Click the blue button that says "next."
Step two is where you will add general information, websites, social media, contact information, and any additional information that is relevant. Please note that this is contact information for your organization, not your contact information, it will be publicly displayed. When asked for the "Organization Web Site URL," you will enter a handle for your organization to create a system URL. This can be the name of your organization, using either hyphens or no spaces, or you can use your organization's acronym. A preview of what the URL will be is shown below.

When finished with your organization, click "next."
In step three, you can see your current organization profile picture. If you do not have a picture or would like to update it, click on "choose file" and change your organization's profile photo.
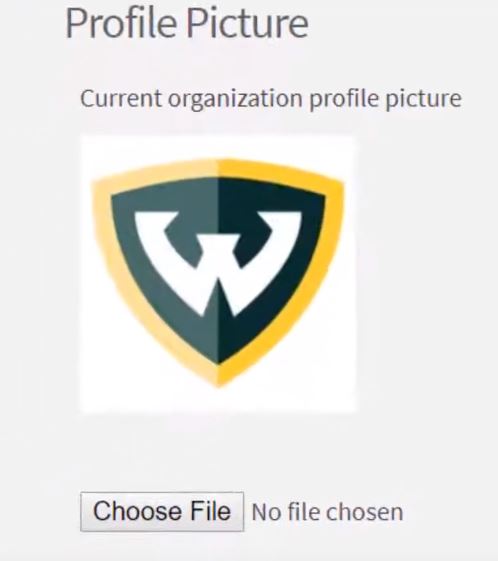
Once done, click the "next button."
In step four, you can select the categories that your organization belongs to. Then click "next."
In step five you will select interests that represent your organization. Note that both categories and interests are important for those looking to join an organization.
Now read over the highlighted instructions in step six. It is important to know that all entries and invitations must use the WSU AccessID, or the person invited will not show up on the Roster. Check "I understand" and click on the "next" button.

In step seven, you can review and add new members and assign positions. Remember that you are required to have one President and at least two total participants to have a student organization. You can also review your roster and change position assignments. Once you are done click on the "next" button.
In step eight, you will have to submit your organization operating agreement. All fields are required.
After you click the "next" button, in step nine you will need to read through the University policies and check off that you have acknowledged you have read the statements.
You will then be taken to the "review submissions" page. You can go back to any part of the submission process and change anything if necessary.
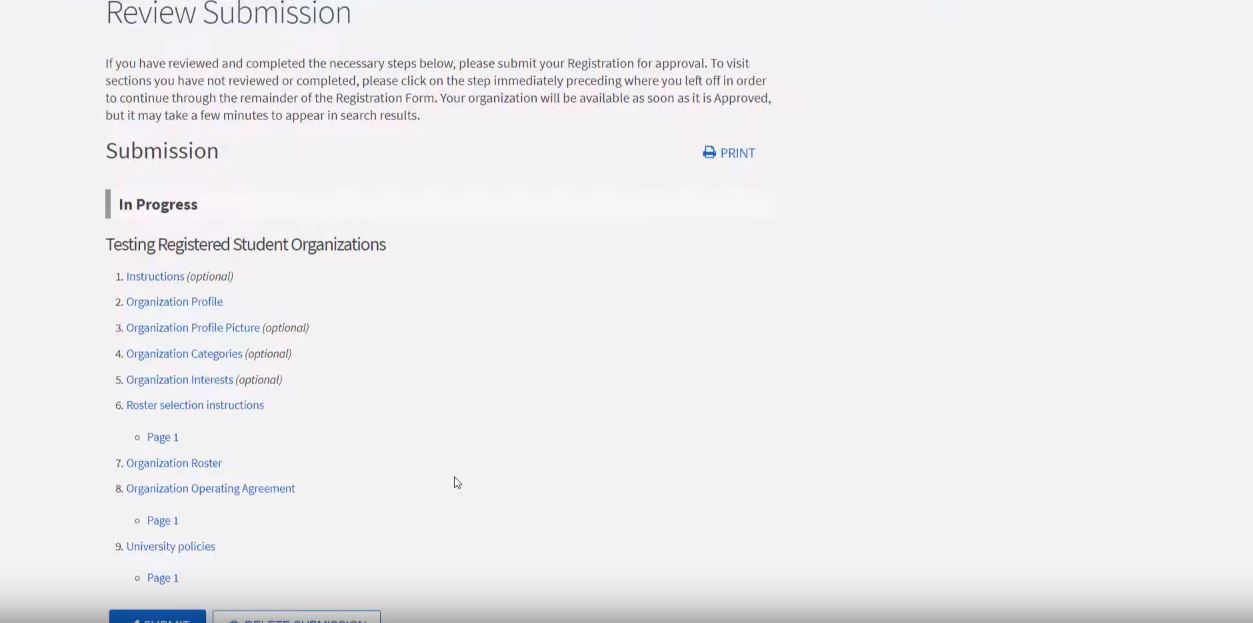
Once you are done click "submit." Your registration will be reviewed by the Deans of Students Office and you will receive a confirmation email when approved or denied. If denied, please review the comments, make the necessary changes, and then resubmit.
If you have any questions, please contact the Dean of Students Office at 313-577-1010 or email doso@wayne.edu and they will happily answer any additional questions.