Audio/visual
Student Center A/V connection guides
Below you will find guides on how to use the audio/visual systems in the rooms located in the Student Center.
Pro tip: Just because your picture show up does not mean the audio will work without any troubleshooting. It is a good practice to test your video and audio before the meeting starts to ensure a smooth experience. We are happy to help you troubleshoot the issues that may arise.
If your laptop does not have an HDMI port, an adapter can be checked out from the information desk at no cost.
If anything appears to be malfunctioning; please call the Student Center team at 313-577-4585 and we will send an operations associate to the room to assist.
Hilberry A-D
Projector
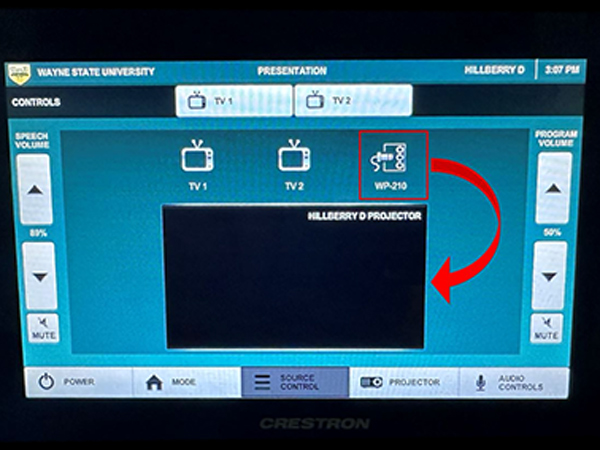
- Connect your device to the HDMI cable that is pre-routed for you in the room.
- Once the device is connected, the signal is routed using the touchscreen on the wall near the entrance to the room.
- Drag the desired wall plate (there is only one option per room) to the projector.
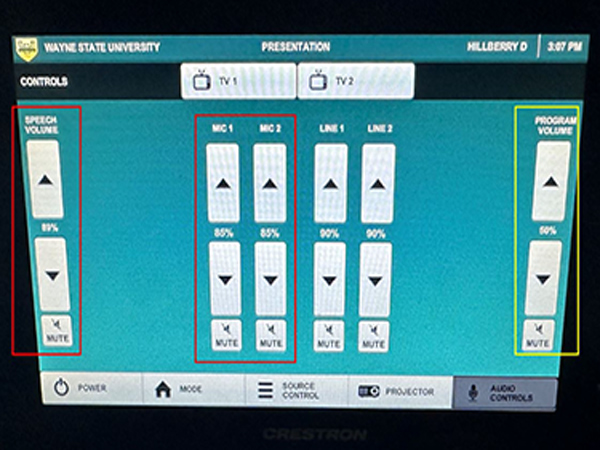
Audio
Program audio (right, outlined in yellow) is the audio from the video source. Microphone levels can be adjusted using the buttons outlined in red (left).
Hilberry E
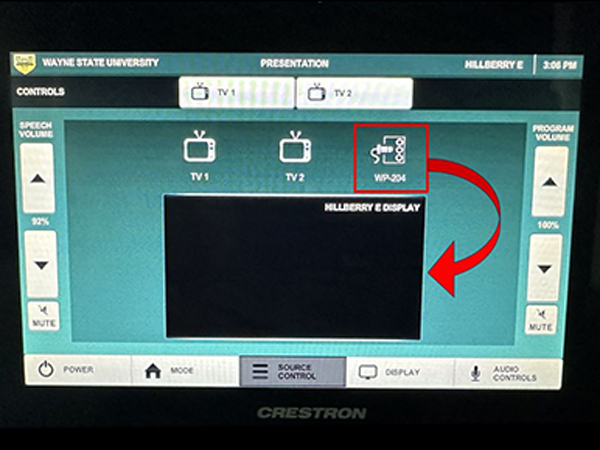
Projector
- Connect your device to the HDMI cable that is pre-routed for you in the room.
- Once the device is connected, the signal is routed using the touchscreen on the wall near the entrance to the room.
- Drag the desired wall plate (there is only one option per room) to the projector.
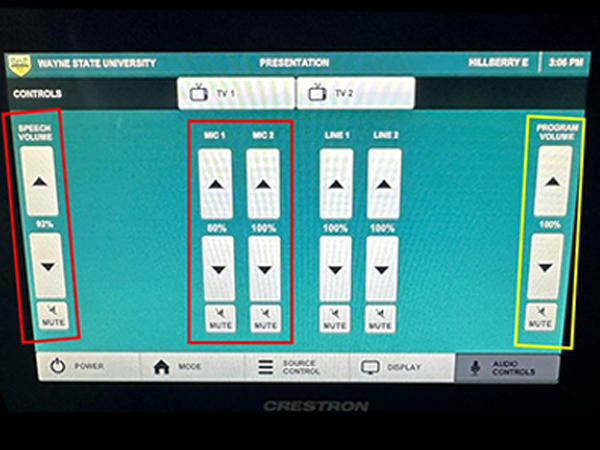
Audio
Program audio (right, outlined in yellow) is the audio from the video source. Microphone levels can be adjusted using the buttons outlined in red (left).
Room 285

Projector
- Connect your device to the HDMI cable that is pre-routed for you in the room.
- Once the device is connected, the signal is routed using the touchscreen on the wall near the entrance to the room.
- Tap the button in the upper right (outlined in red) to send to the video signal to the projector.
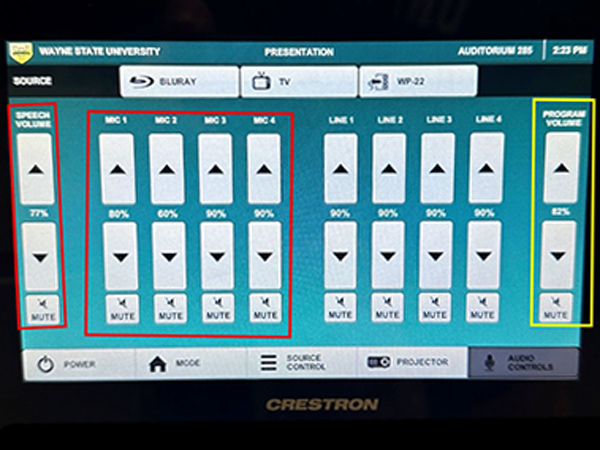
Audio
Program audio (right, outlined in yellow) is the audio from the video source. Microphone levels can be adjusted using the buttons outlined in red (left).
Small conference rooms: 009, 010, 201, 279, 281, 389

- Connect your device to the HDMI cable that is pre-routed for you in the room.
- Once the device is connected, the signal is routed using the button panel on the wall.
- Tap the HDMI button (top, outlined in red) to turn the system on and send signal to the TV.
- Volumn can be adjusted using the buttons outlined in yellow (bottom).
Additional A/V services for General Purpose Classroom spaces
Equipment not included with built-In A/V
| Equipment | Registered Student Organizations | University departments | External organizations |
|---|---|---|---|
| Microphone (per unit) | $50 | $50 | $100 |
| Livestream event | $100 | $100 | $250 |
| Remove instructor cart | $100 | $100 | $250 |
| PA system: mixer, speakers, mic | $100 | $100 | $200 |
| Projector/display | $100 | $100 | $200 |
Labor charges for on-site technicians (per hour)
| Technician type | Registered Student Organizations | University departments | External organizations |
|---|---|---|---|
| Full-time technician | $100 | $100 | $200 |
| Student assistant | $25 | $25 | $100 |