Get involved on campus
Whether you are looking to expand your network, connect with other students within your field, or be a part of an organization that is focused on your passions or hobbies, the Dean of Students Office will help students find ways to engage and explore these opportunities throughout campus.
Get Involved platform
The Get Involved platform, powered by Engage, is a way for students to explore upcoming events, discover new and existing organizations, and stay up-to-date on what is happening around campus.
Learn more about navigating the platform with our Basics of Get Involved resource.
Get your Event Pass
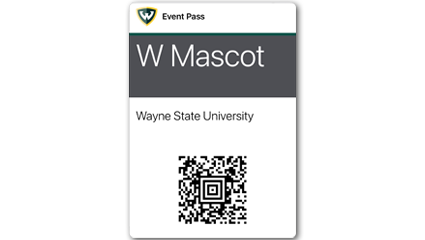
Your Event Pass is a QR code that is unique to every student. This pass is your ticket into events on campus, including events that count for Warrior Rewards credit. Students can access their Event Pass through their profile on Get Involved, or through the Corq app.
Download Corq

The Corq app gives students quicks access to a list of events on campus. Students can RSVP and view their calendar of events all within the app. Corq pulls all of the events and RSVPs listed in the Get Involved platform.
Student organizations
Join a Registered Student Organization
One of the best ways to get involved on campus and meet like-minded students is to join a student organization. A list of current Registered Student Organizations (RSOs) are listed on the Get Involved platform.
How to join a student organization
Not finding one that suits your interest? Start your own organization!
View the list of the 2023-24 Registered Student Organizations
Student organization fairs
The following student organization fairs are annual traditions that showcase more than 500 student organizations, campus departments, community organizations and learning communities.
| Event | Date |
|---|---|
| FestiFall | Sunday, Aug. 25, 2024 |
| WinterFest | Wed. Jan. 22, 2025 |
| SpringFest | April 2025 |
Department-supported student organizations
Campus Activities Team
The Campus Activities Team (CAT) is a student-led board that strives to establish opportunities for students to make personal and campus-oriented connections through a wide range of programming opportunities both on and off campus.
Fraternity and Sorority Life
Fraternities and sororities are organizations that share common interests, values, or areas of academic study. Wayne State University has chapters for 27 national social fraternities and sororities, and many other professional and independent Greek-letter organizations.
Student Senate
The Student Senate is the official student government at Wayne State University. Made up of students from every school and college, who have been elected to represent and serve you. It is their job to work on your behalf to improve the student experience at Wayne State University and to support student success.
The South End newspaper
The South End has operated as Wayne State University's official student-run newspaper since 1967. Its mission is to serve the Wayne State community through honest journalism and a passion for storytelling. TSE welcomes all interested writers, reporters, photographers, and graphic designers.
WAYN Radio
WAYN Radio is Wayne State's student-run radio station. Broadcasting 24/7, WAYN gives every student the opportunity to learn professionally about radio, have their own shows and podcasts, and listen to the music of local musicians from Wayne State and beyond.